Clarify that users must select the MQTT Integration instead of the hub’s MQTT server, with step-by-step guidance provided.
2.3 KiB
Installation Guide
Step 1: Configure the Futurehome App
-
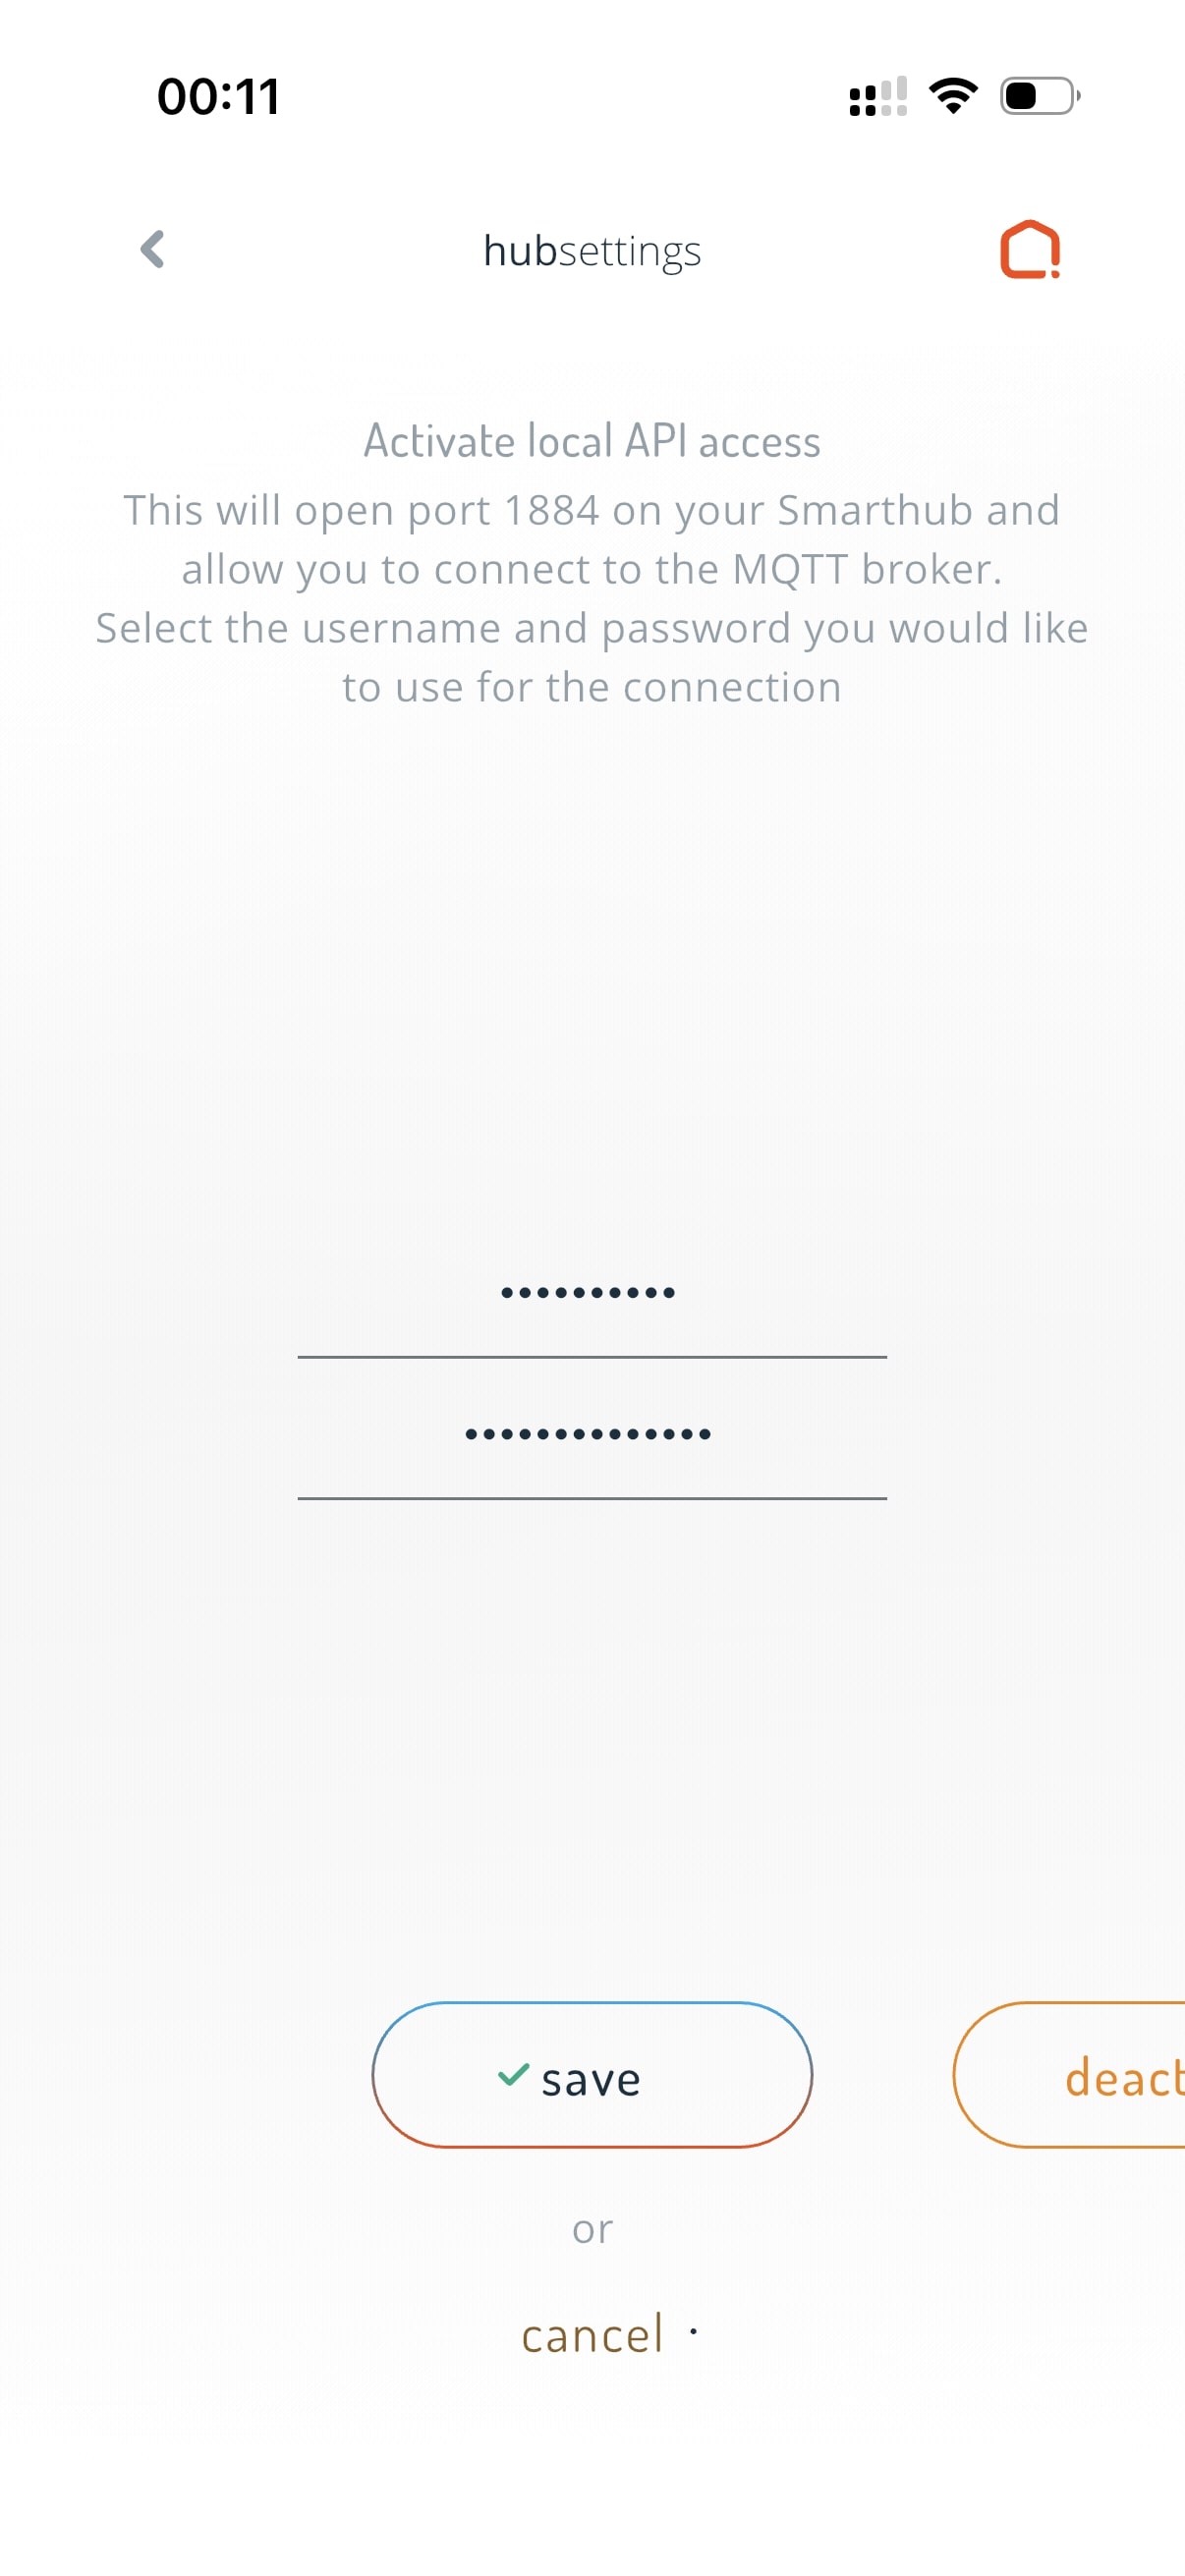
Enable Local API
Open the Futurehome app and navigate to: Settings > My household > Smarthub, then set up Local API.
-
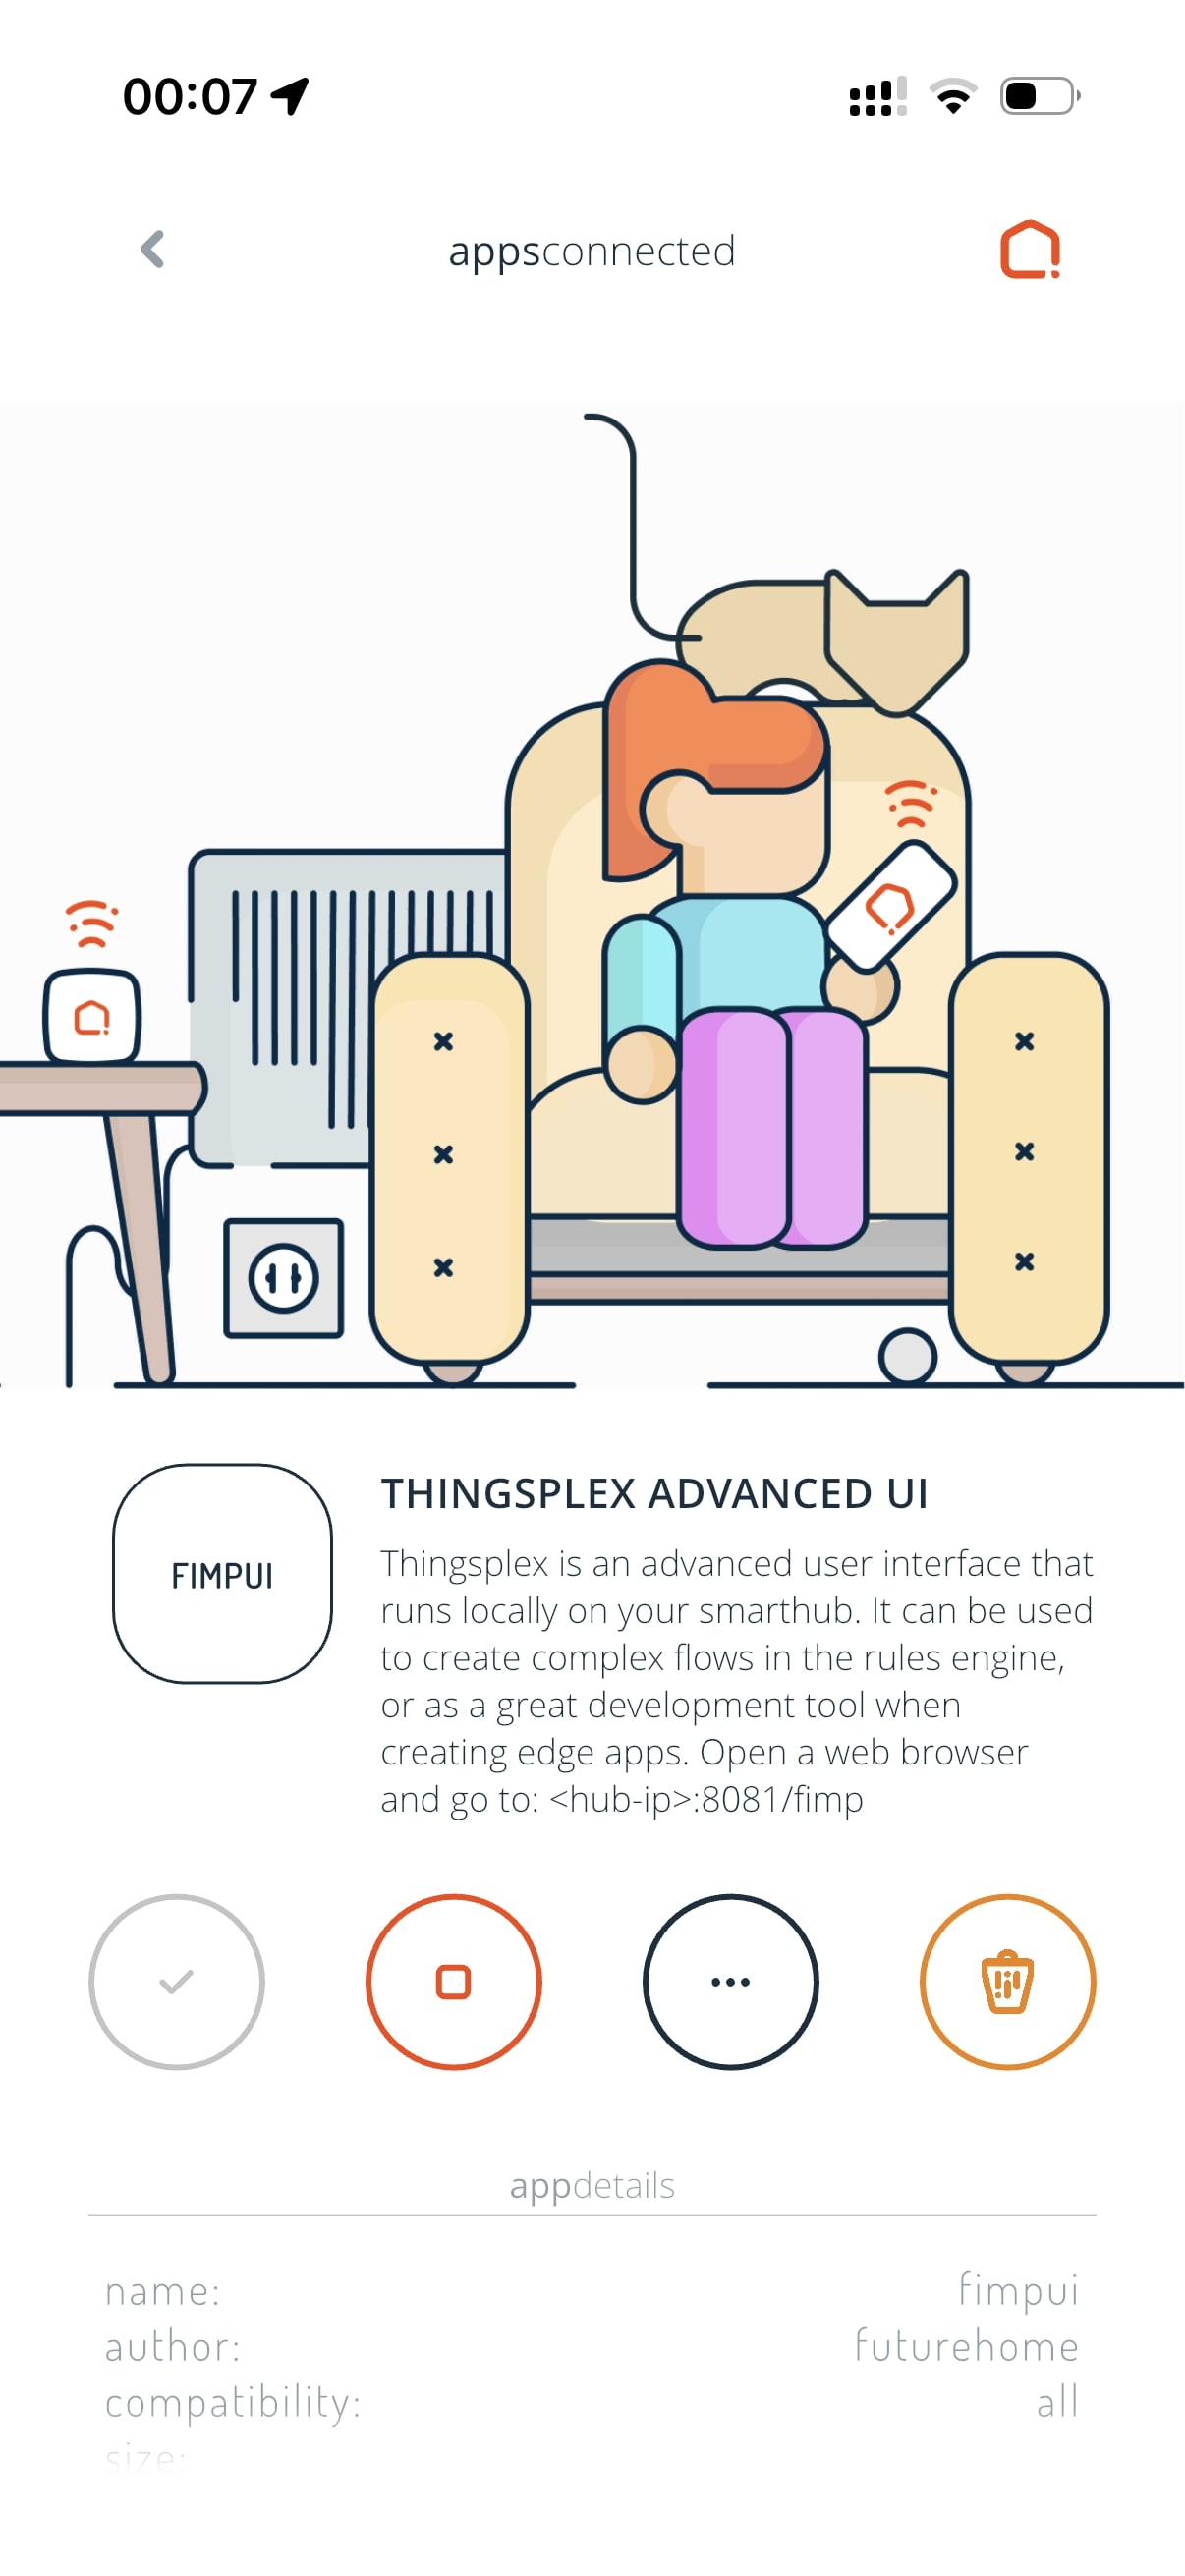
(Optional) Install Thingsplex Integration
Thingsplex is an integration for debugging hub adapters. It's also used by this add-on to support pairing and unpairing devices.
- Go to Settings > Integrations, install and start "Thingsplex Advanced UI".
- Open the integration’s "..." menu, set a username and password, then save.
-
(Optional but recommended) Block WAN Access To prevent future firmware updates that might break local functionality, block the hub’s internet access via your router settings.
Step 2: Set Up in Home Assistant
-
Enable MQTT Integration
Add the MQTT integration by going to Settings → Devices & Services → Integrations → Add integration, search for and select MQTT → MQTT, then choose "Use the official Mosquitto MQTT Broker add-on".
-
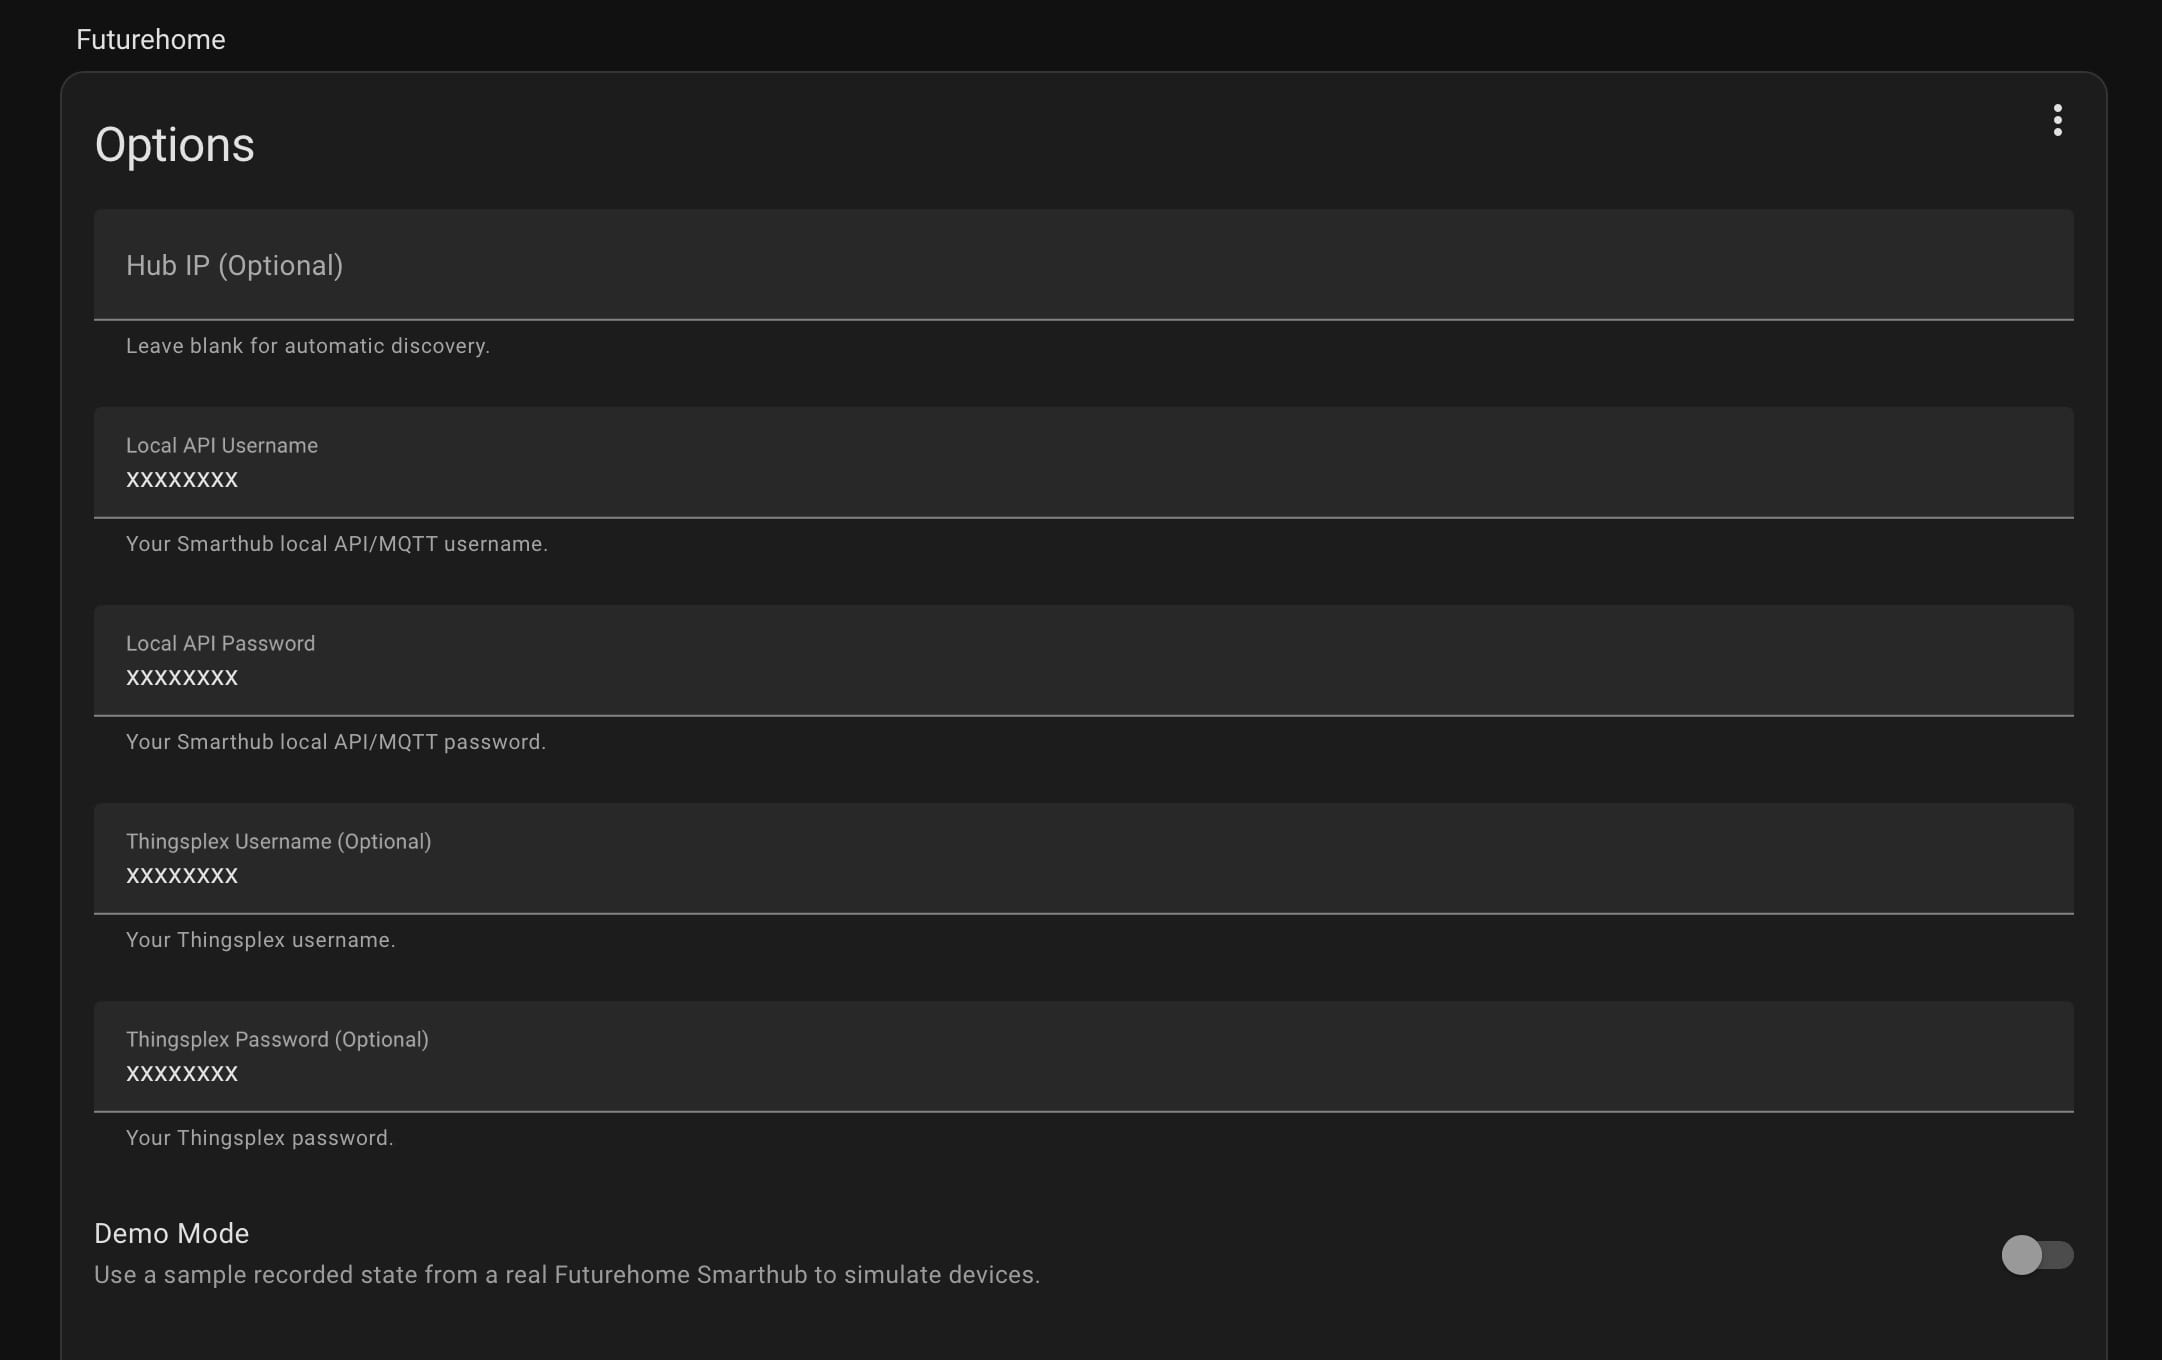
Install the Futurehome Add-on
Click the button below to install the Futurehome add-on in your Home Assistant:

Finally, configure and start the add-on.
Troubleshooting
Q: My Futurehome trial expired and I can’t modify hub settings to enable Local API. What can I do?
- Perform a factory reset on the hub.
- Open the Futurehome app, create a new household, and re-add the hub.